April 24, 2025
Building a Pomodoro Timer with TypeScript: Step-by-Step Guide

Have you ever lost attention after a few minutes of work? You have company. A 25-minute work session time management strategy called the Pomodoro Technique has helped many people remain on track. I wanted a custom timer when I found it. That led me to create a TypeScript Pomodoro Timer. This tutorial will help you create one. It is a nice way to practice TypeScript and do something useful!
Setting Up the Development Environment
Beginners require a few tools. Install Node.js first. Consider VS coding for a coding editor. With that, create and establish a project folder:
npm init -y
Next, install TypeScript and set up its configuration:
npm install typescript --save-dev
npx tsc –init
This creates tsconfig.json file. CSet up folders for separating code (src) and compiled files (dist). When implementation, a neat arrangement keeps everything organized.
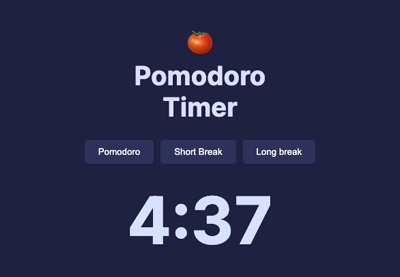
Designing the Timer Interface
First, let's figure out what the main layout will be. A start, pause, reset, and countdown display must exist for your timer. For ease of use, use simple HTML and CSS. An example of the structure:
<div id="timer">
  <h1>Pomodoro Timer</h1>
  <p id="time">25:00</p>
  <button id="start">Start</button>
  <button id="pause">Pause</button>
  <button id="reset">Reset</button>
</div>
This gives you a very basic structure. You can add styles or even a library like React to make it better in the future for more complex UI needs.
Implementing Timer Functionality
Now comes the fun part: writing the concept! Strong typing in TypeScript lets us make sure our code is strong. First, you need to set the timer's state:
type TimerState = "stopped" | "running" | "paused";

class PomodoroTimer {
  private duration: number;
  private remainingTime: number;
  private state: TimerState;
  private intervalId: NodeJS.Timeout | null;

  constructor(duration: number = 25 * 60) {
    this.duration = duration;
    this.remainingTime = duration;
    this.state = "stopped";
    this.intervalId = null;
  }
}
Next, add methods for starting, pausing, and resetting the timer:
start() {
  if (this.state === "running") return;
  this.state = "running";
  this.intervalId = setInterval(() => {
    if (this.remainingTime > 0) {
      this.remainingTime--;
      this.updateDisplay();
    } else {
      this.reset();
      this.notify();
    }
  }, 1000);
}

pause() {
  if (this.state === "running" && this.intervalId) {
    clearInterval(this.intervalId);
    this.state = "paused";
  }
}

reset() {
  if (this.intervalId) clearInterval(this.intervalId);
  this.remainingTime = this.duration;
  this.state = "stopped";
  this.updateDisplay();
}
Finally, create a method to update the UI dynamically:
updateDisplay() {
  const minutes = Math.floor(this.remainingTime / 60);
  const seconds = this.remainingTime % 60;
  document.getElementById("time")!.innerText = `${minutes}:${seconds.toString().padStart(2, "0")}`;
}
Adding Notifications and Sound
Alerts are an important part of a timer. When the session is over, use the Web Notifications API to show a desktop alert:
notify() {
  if (Notification.permission === "granted") {
    new Notification("Pomodoro session complete!");
  } else {
    Notification.requestPermission();
  }
}
For sound effects, integrate an audio file:
playSound() {
  const audio = new Audio("alarm.mp3");
  audio.play();
}
Styling the Timer
A clean, responsive design makes your timer more enjoyable to use. Here's some basic CSS:
#timer {
  font-family: Arial, sans-serif;
  text-align: center;
  margin-top: 50px;
}

button {
  margin: 5px;
  padding: 10px 20px;
  font-size: 16px;
  cursor: pointer;
}
Deploying Your Timer
As soon as your timer works, you can share it! To launch, use tools like GitHub Pages or Vercel. Just add your code to a GitHub project and turn on GitHub Pages in the settings for that source. You could also use Vercel for an easy distribution method.
Conclusion
Excellent work! You used TypeScript to make your own Pomodoro Timer. You have learned how to set up a project, add style and alerts, and set up a timer. TypeScript not only made the code more stable, but it also made it simpler to keep up to date. The best part? You can add things like changeable time frames or a job list, this is just the beginning. Now, go out and concentrate like never before!
1.6k views