December 20, 2024
Implementing Face Recognition with Python and Dlib in Just a Few Lines
Are you curious how your phone unlocks by just seeing it? How do social media networks automatically tag friends? Hidden face recognition technology makes it possible. Python with the strong Dlib library allow face recognition with a few lines of code. This post will show you how to easily identify and recognize faces in photos using Dlib. Let's get started!
Setting Up Your Environment
You must have dlib, opencv-python, and numpy to proceed. Dlib is the main face detection and recognition library, OpenCV loads and manipulates images, and NumPy handles numerical computations.
pip install dlib opencv-python numpy
Loading and Preparing the Image
The first step is to load an image for face detection and recognition. I'll use OpenCV to handle this:
import cv2

# Load the image
image = cv2.imread('your_image.jpg')

# Optionally, resize or convert to grayscale if needed
# image = cv2.resize(image, (500, 500))
Using Dlib for Face Detection
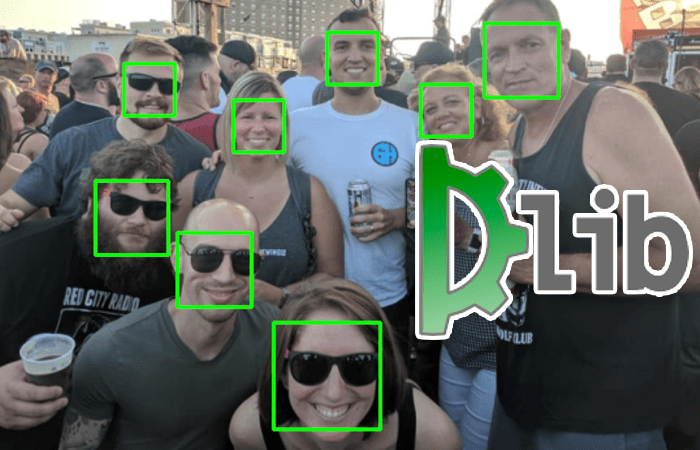
Dlib's strong face detection tool makes image face detection basic. A pre-trained model that recognizes 68 facial landmarks in Dlib allows exact face detection.
import dlib

# Initialize Dlib's face detector
detector = dlib.get_frontal_face_detector()

# Detect faces in the image
faces = detector(image)

# Draw rectangles around detected faces
for face in faces:
    x, y, w, h = face.left(), face.top(), face.width(), face.height()
    cv2.rectangle(image, (x, y), (x + w, y + h), (255, 0, 0), 2)
This code finds faces and draws bounding boxes to show the results. Dlib's face detector recognizes important facial features for better detection.
Implementing Face Recognition with Dlib
Face detection is working, so let's try face recognition. Dlib's face_recognition_model creates unique face embeddings (or face encodings). You can compare and identify faces using these embeddings.
# Load Dlib's pretrained model for facial recognition
sp = dlib.shape_predictor("shape_predictor_68_face_landmarks.dat")
facerec = dlib.face_recognition_model_v1("dlib_face_recognition_resnet_model_v1.dat")

# Extract embeddings for each detected face
face_descriptors = []
for face in faces:
    shape = sp(image, face)
    face_descriptor = facerec.compute_face_descriptor(image, shape)
    face_descriptors.append(face_descriptor)

# Comparing faces
def compare_faces(face_desc1, face_desc2):
    return np.linalg.norm(np.array(face_desc1) - np.array(face_desc2))

# Example: Compare first two faces
if len(face_descriptors) >= 2:
    distance = compare_faces(face_descriptors[0], face_descriptors[1])
    print(f"Distance between faces: {distance}")
Each detected face is a 128-dimensional vector. Calculating face encoding distances using these vectors lets us compare faces. A smaller distance suggests the faces are the same.
Testing and Enhancing Your Model
You can test face recognition with different photos and situations after setting it up. For the best results, try a bigger sample or change the identification level. To make sure your model works well in a variety of settings, try different lighting and pose options.
Conclusion
With a few lines of Python and Dlib code, you can make a machine that can recognize faces. It is easy to move this setup to real-time apps or bigger projects because it is strong. Face recognition is now easier than ever, so give it a try!
990 views
